
How it works?
The process of modifying the UI is pretty straightforward, you create/download a CSS file, then load it on the browser
What do I need?
- At least, Vivaldi version 2.6
- You can check your Vivaldi version by going in “vivaldi://about/”
- Basic knowledge of CSS
First step – Enabling support for CSS mods
This must be done only once per Vivaldi installation.
- Go to “vivaldi://experiments/”
- Tick “Allow for using CSS modifications”
Second step – Creating your own mods
If you know how CSS works, you know having access to the HTML code is mandatory, and we can do that through Chromium’s DevTools
There’s some different ways to inspect the UI, such as with custom app shortcuts, but the easiest one, in my opinion, is through Chromium’s inspect page.
- Go to “vivaldi://inspect/#apps“
- In this page, you’ll have every Vivaldi window listed as a Chromium extension.
You can differentiate the windows by checking their children, that is their tabs.
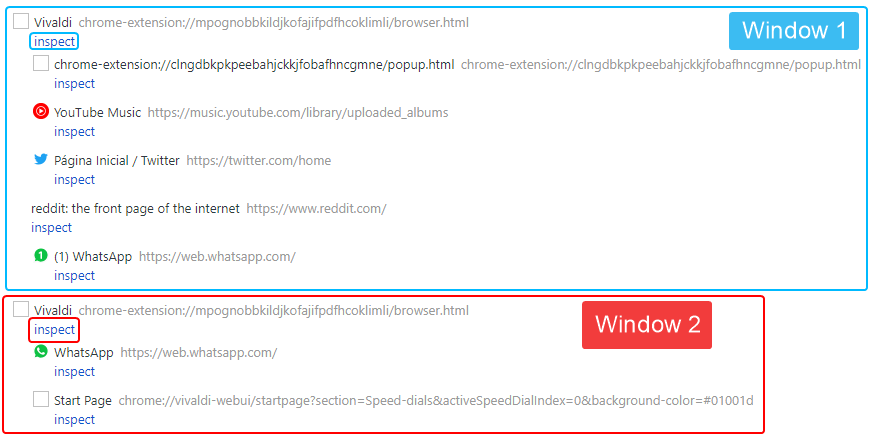
- Click on the first “inspect” under the window you wanna use as “testsubject”
In the image above, the highlighted “inspect” buttons are the ones responsible to open the DevTools inspecting the UI of their window.
Once the Chromium DevTools is opened up, you can now inspect the UI and test your modifications, before even saving them in the CSS file.
Here’s a quick overview of the Chromium’s DevTools:
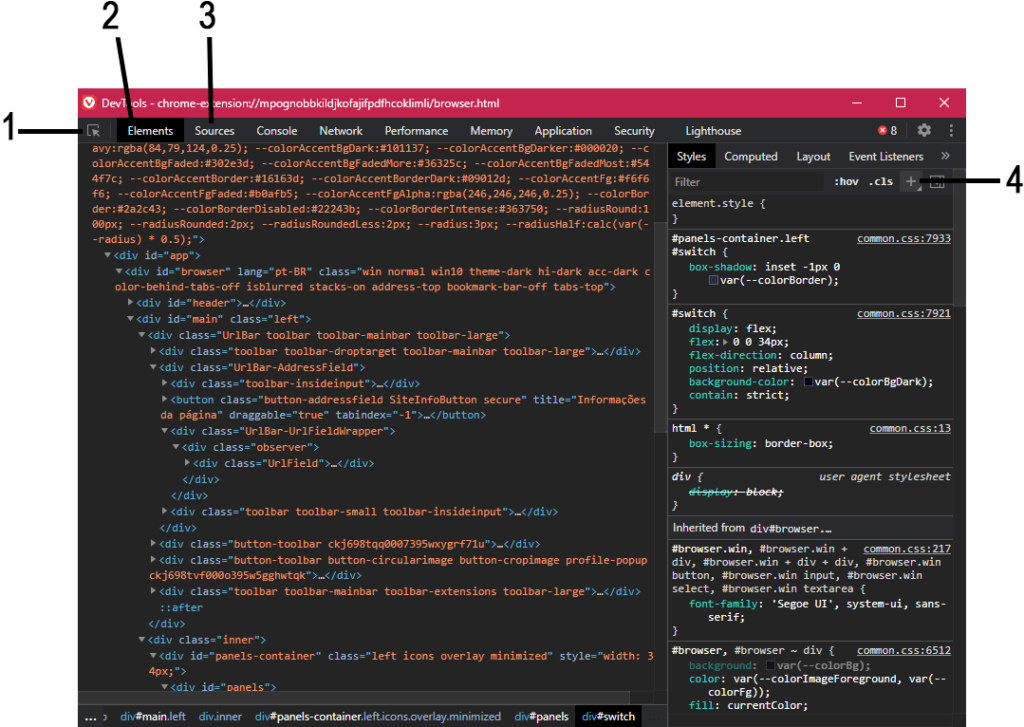
- Button that allows you to “click” and select a UI element.
It only works with the parent window of the DevTools. - Tab where all the HTML code is displayed as well with the selected HTML tag’s CSS classes
- Tab where you can check the files being loaded with the UI, such as Vivaldi’s own CSS and your mods as well.
- Button that creates a custom CSS class for the selected HTML tag. Classes created within the DevTools have their source named as “inspector-stylesheet“
Example: Adding spacing on the left and right of the Address field
So, let’s suppose you want to add a spacing before and after the address field. First, click in the “select element” button (1), then click within the address field.
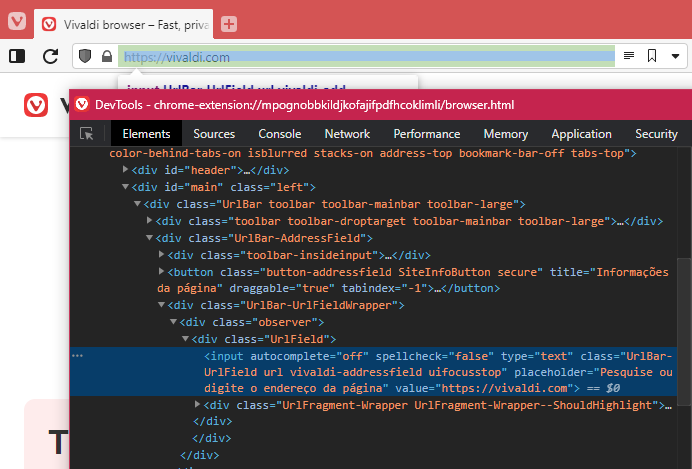
In our case, this ends up selecting the input field of the address bar, but not the address bar itself.
However, since the code was expanded to show the input tag, we can just browse through the nearest tags until we found what we are looking for.
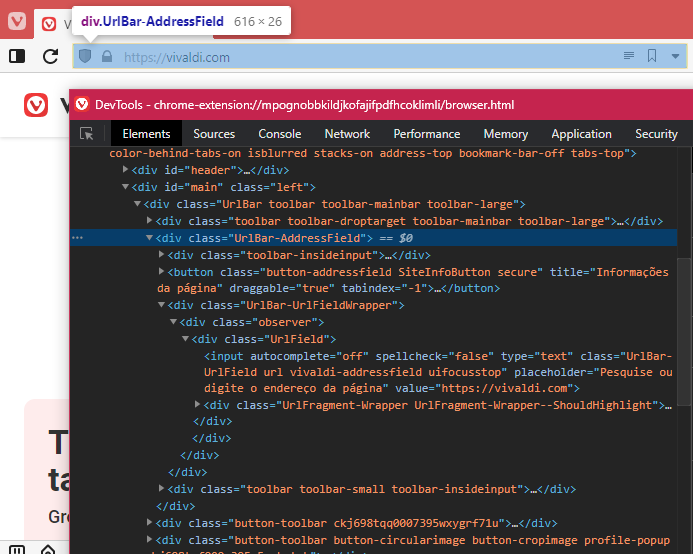
Placing the cursor over “<div class="UrlBar-AddressField">” turns out to highlight the entire address bar, just like we wanted.
With the proper tag found, we can create a CSS class for it.
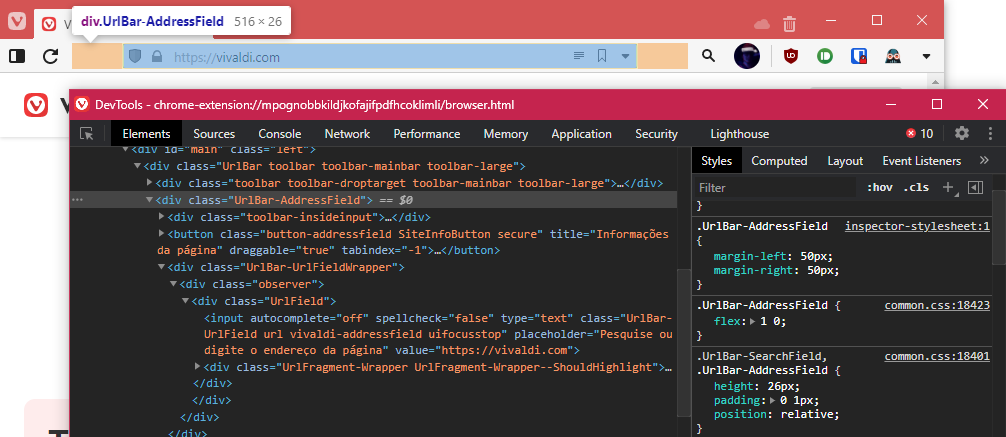
Clicking on the button to add a new class, just type “margin-left”, hit enter, then type “50px” and hit enter again. Now, repeat with “margin-right” and voilà.
PS: Of course, there’s better (and more complex) ways of achieving this result, but they are out of scope for this simple guide 🙂
Now, clicking on “inspector-stylesheet:1” should open the “Sources” tab with our temporary CSS file, containing every class we’ve created.
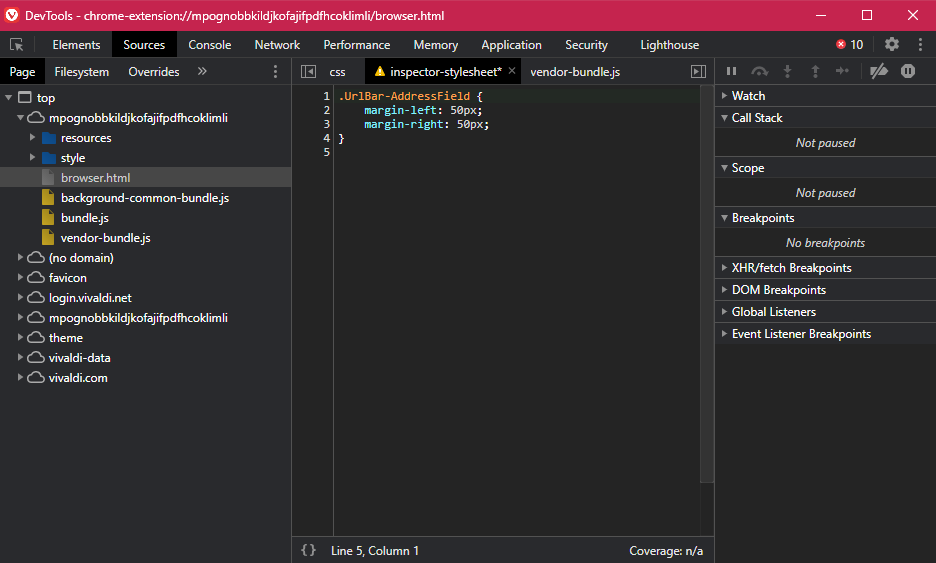
Those classes are the code you’re going to save as your mod, within somewhere safe in your PC.
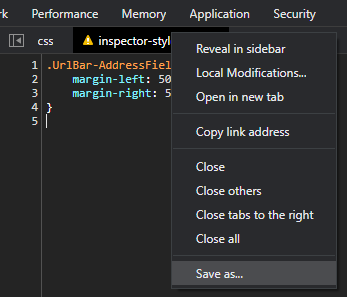
You can either copy it all, paste into a text editor and save as .css file, or right click in the “inspector-stylesheet” title and select “Save as…”
TIP: Pressing F5 with the DevTools window focused will refresh the UI of the “test subject” window. Be aware that this will ERASE every temporary CSS classes created within that DevTools.
Third step – Loading your CSS mods in Vivaldi
- Open the browser settings
- Go to “Appearance” and scroll down until you reach “Custom UI Modifications”
- Click on “Select Folder” and select the folder where your CSS mods will be installed
Note: This will load EVERY CSS file within the folder selected
Now, you can either restart Vivaldi by going to “vivaldi://restart” or refreshing the UI of every window with the tip I’ve mentioned in the previous step.